Batch processing
The "Batch render" command in Photo Ninja can be used to automate the rendering of JPEG or TIFF output for multiple images.
Each image in a batch is processed using the editor settings that have been saved or copy-pasted to the image's XMP metadata. If an image hasn't been edited and no settings have been copy-pasted to it, then the current global default preset will be applied.
To process a batch of images, select the images in the browser or thumbstrip using the usual shift-click and option-click operations. Then right-click on one of the selected images and choose "Batch render...":
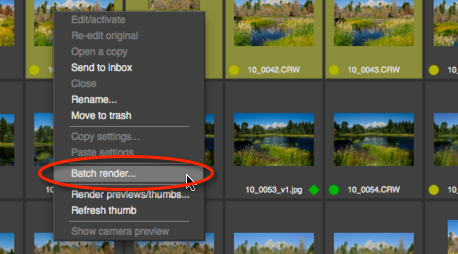
This will display the JPEG/TIFF render dialog. Configure the dialog as you wish, then click "OK". You should use a file naming template so that each image in the batch is named uniquely.
If your naming and folder selections will cause files to be overwritten, you will be asked to confirm before proceeding.
The batch processor will open each file in the batch, apply the appropriate editor settings, and then render to JPEG/TIFF. It will also update thumbnails and previews for the images in the batch.
TIP: If you need to match exposures across images in a batch (for instance if you are creating a stitched panorama from the rendered images), you can use the Absolute exposure mode in the Exposure and Detail panel.
TIP: In the render dialog, you can set the folder to "Save to original folder" and then specify a subfolder name, and the output of the batch will be stored together in the subfolder without being intermingled with the original files.
NOTE: If you only want to update thumbnails and previews without rendering to JPEG/TIFF, use the "Render previews/thumbs" command instead.