Rendering to JPEG/TIFF
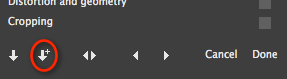
To save your work to a JPEG or TIFF file, click on the "Render as" button at the bottom of the filter selector panel:
The dialog that pops up might look a little intimidating at first, but it is actually straightforward.
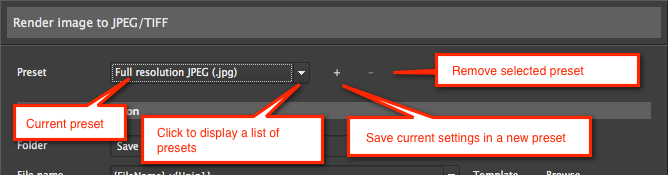
The Preset dropdown at the top is a convenient way to manage rendering settings:
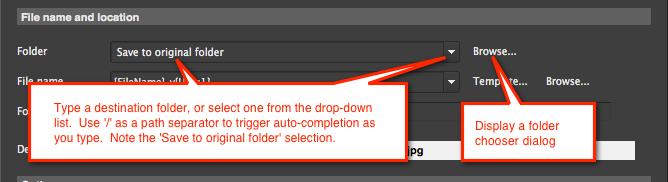
The folder path is specified separately from the file name, so you can easily switch to another folder or use the "Save to original folder" option without disturbing the file name or template. If you select "Save to original folder", the output file will be written in the same folder as the original file.
For the file name, you can type, select, or browse to a name, or you can create a template. A template will automatically generate a new name for each file that can depend on the original file name, date, a project name, a unique version number, or other pattern tokens. Note that the file name doesn't include the file type suffix.
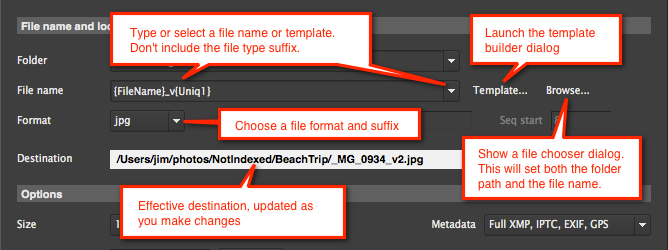
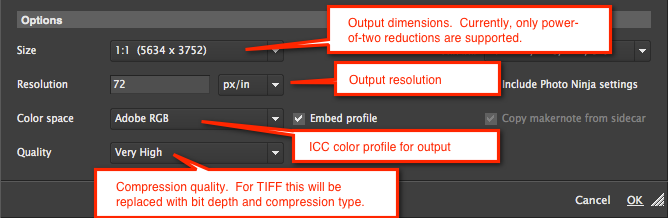
Several output options are available. These will be slightly different depending on whether you have selected JPEG or TIFF as the output file type.
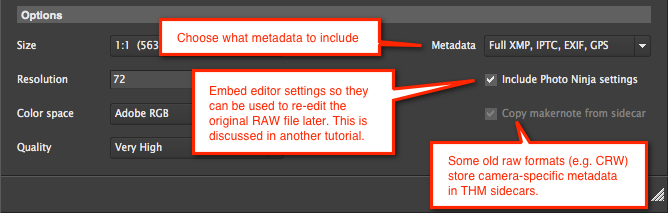
You can specify what metadata to embed in the output file, and whether to save the adjustments that you applied to the image:
Once you have everything the way you want, click "OK" and the file will be rendered.
Tip: You can use the Quick Render button to render to partially automate repetitive or systematic output to JPEG/TIFF. It will automatically generate a file name using a naming template, without showing a dialog each time. You can also configure it to update XMP and/or close the file that you are editing after rendering.
Tip: If you tend to use the same rendering settings repeatedly, save them in a preset. This can be especially useful in combination with a filename template.
Tip: You can use the "Command-Shift-S" keyboard shortcut to invoke the Render As function. (This shortcut is temporarily disabled if you are adjusting a filter.)
Note: The render dialog settings are remembered across invocations.