Setting the white balance
One of the first steps in most workflows is to remove color any color cast due to the light source of the scene. For instance, tungsten light can make the scene appear too red, while open sky can make everything too blue. Removing these color casts is called "white balancing", and is easily accomplished in Photo Ninja. Just follow the steps below.
Click on "Color Correction" in the editor's filter list:

By default, the filter will attempt to use white balance information recorded by the camera if it is available. In most cases, if the camera white balance isn't right, you'll want to adjust the Temperature slider and possibly the Tint slider:
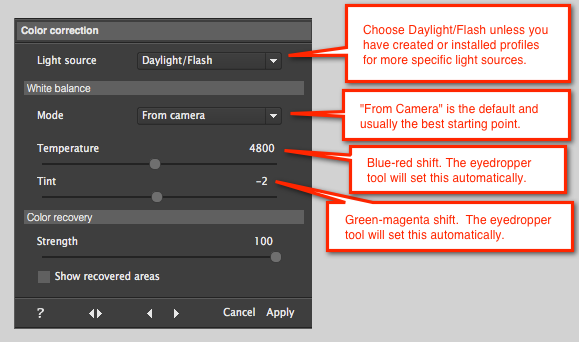
If the image has a region in it that you know should be white or grey, then you can use the eyedropper tool to automatically set the white balance. The eyedropper is always active while the Color Correction panel is visible. Move the eyedropper to the appropriate spot in the image and click on it; the appropriate white balance will be calculated automatically:
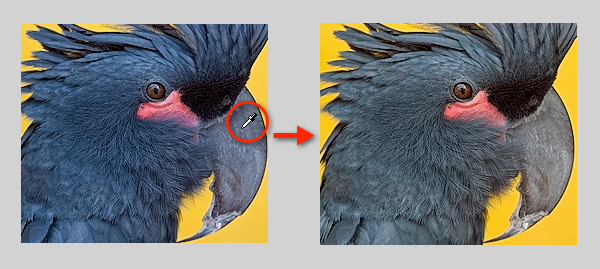
NOTE: To pan while the eyedropper tool is active, press and hold the spacebar to temporarily disable it.
NOTE: You can click and drag the eyedropper to calculate an average white balance over multiple pixels.
NOTE: When using the eyedropper, avoid regions that have been contaminated by reflections from nearby colored surfaces. Try to identify a surface that was white or grey in the original scene and that was also reflecting the light source for the scene.