Using Photo Ninja with Adobe Lightroom
Photo Ninja can be used as an external editor for Lightroom. When you choose to edit an image in Photo Ninja, Lightroom will render a TIFF or JPEG from the raw file and send it to Photo Ninja. You can configure Photo Ninja to ignore the JPEG/TIFF and open the RAW file directly, and then overwrite the JPEG/TIFF with the results. You can also embed Photo Ninja's settings in the JPEG/TIFF so that you can re-edit the RAW file with the same settings if you send the JPEG/TIFF back to Photo Ninja later. In effect, you can maintain distinct "versions" of an image in Lightroom's catalog that you can adjust and render in Photo Ninja.
Shadow XMP
If you use Photo Ninja and Lightroom in the same workflow, it is recommended that you enable the "Shadow XMP" option in Photo Ninja's Preferences dialog:
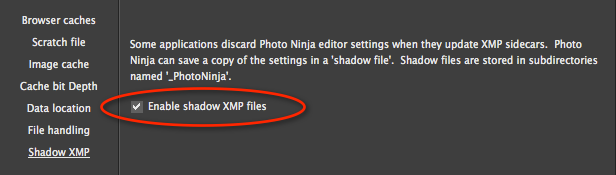
Lightroom's function for exporting metadata to XMP does not preserve third-party metadata, and it deletes editor settings that Photo Ninja has stored in the XMP. When you turn on the Shadow XMP function, Photo Ninja makes a backup copy of the settings in a "shadow" XMP file in a subfolder named "_PhotoNinja". If Lightroom overwrites the "real" XMP sidecar (or embedded XMP in a DNG or JPEG/TIFF), Photo Ninja will attempt to recover the settings from the shadow copy.
External editor setup
To use Photo Ninja as an external editor for Lightroom, follow these steps:
- In Lightroom, go to the Preferences dialog and activate the "External Editing" prefences page. Click "Choose" and navigate to the Photo Ninja application. For the intermediate file format, select JPEG or TIFF. If you choose TIFF, we recommend the 16-bit option and Adobe RGB or Pro Photo RGB for the color space. (See the note below concerning JPEG vs. TIFF for intermediate files.)
- Make sure the file naming scheme for the intermediate JPEG or TIFF matches one of the patterns described below.
- In Photo Ninja's Preferences dialog, go to the File Handling page and enable "Attempt to open/re-edit matching RAW file when JPEG/TIFF received from another application".
- When you render a JPEG or TIFF, make sure you check "Include Photo Ninja settings" in the Render dialog (in the Metadata section). This will embed editor settings in the JPEG/TIFF that are "linked" to the original raw file.
- In Lightroom, right-click on a thumbnail and choose "Edit with Photo Ninja". This should launch Photo Ninja if it isn't already running, and send the image to it. If the image is a raw file, it will be opened directly. If it is a JPEG or TIFF and you have followed steps #2 and #3 above, then Photo Ninja will attempt to locate the matching raw file, and it will apply the linked settings that were embedded in the JPEG/TIFF.
- Make adjustments in Photo Ninja as usual.
- When you are finished, render over the JPEG or TIFF that Lightroom provided. The Quick Render button should already be pre-populated with the path and name of the intermediate JPEG/TIFF.
- If you sent a JPEG/TIFF to Photo Ninja, then you can render the new adjustments on top of it. The Quick Render button should already be populated with the file name, path, and rendering settings.
Naming requirements for the intermediate JPEG/TIFF
For the intermediate JPEG or TIFF, you must configure Lightroom to use one of the following naming schemes so that Photo Ninja can locate the RAW file:
- {FileName}-{Digits} where {FileName} is the RAW file name and {Digits} is a sequence of digits. For instance, "IMG_1234-1.TIF".
- {FileName}-Edit{Digits} (for instance, "IMG_1234-Edit1.TIF")
- {FileName}_v{Digits} (for instance, "IMG_1234_v1.TIF")
- {FileName} {Digits} (for instance, "IMG_1234 1.TIF")
- {FileName}-{suffix} where suffix can be anything but FileName cannot contain any hyphens.
JPEG vs TIFF for intermediate files
TIFF files tend to consume much more disk space than JPEGs, while JPEGs have limited bit depth (dynamic range) and employ a lossy compression scheme. TIFF is typically preferred when high-quality output is needed for printing or for subsequent editing.
Depending on your needs, it might make sense to use JPEG (with linked settings) for intermediate files, and then use Photo Ninja's "re-edit original" feature to render temporary TIFF files on an as-needed basis. The JPEG can serve as a placeholder in the Lightroom catalog with its own thumnbail. Because it has linked settings you can send it to Photo Ninja at any time to re-open the RAW file with those settings applied and render to TIFF.
NOTE: The "Re-edit original" functionality is described in more detail here.
NOTE: On Mac, you can drag-and-drop files between Lightroom and Photo Ninja, and from Photo Ninja back to Lightroom. This does not require registering Photo Ninja as an external editor. Also, you can set Photo Ninja preferences so it attempts to use the "Re-edit original" command if you drag a JPEG or TIFF.