Adjusting brightness and tone
The "Exposure and Detail" filter includes a handful of controls for adjusting brightness, tone, and contrast. There is a lot of power and innovation in these controls, and they offer a rich set of possibilities for taming highlights, lightening shadows, manipulating contrast, and overcoming backlighting.
Brightness controls
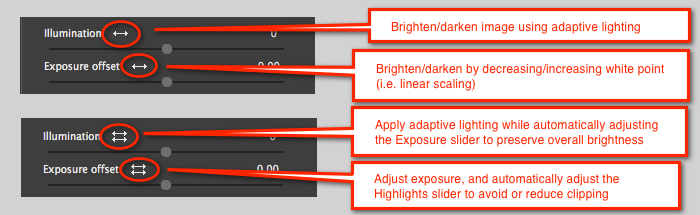
There are two ways to adjust overall brightness:
- The Illumination slider applies a sophisticated adaptive lighting algorithm that compresses or expands global contrast while adjusting brightness.
- The Exposure Offset slider simply scales the brightness levels in the image by a constant factor, effectively moving the white clipping point up or down.
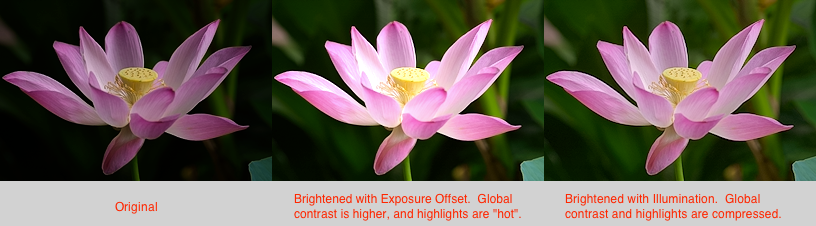
Here is an illustration of the difference between the Illumination slider and the Exposure Offset slider for adjusting brightness:
Highlight, shadow, and contrast controls
Additional sliders target particular tonal regions or overall contrast, and are mostly self-explanatory:
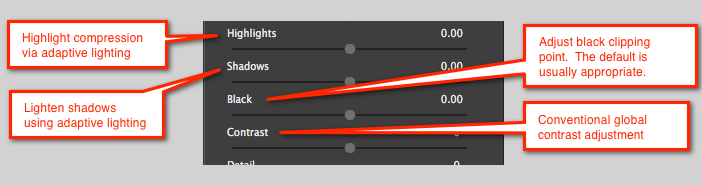
The Highlights slider is particularly useful. When moved to the left, it effectively compresses the highlights and can bring out substantial detail. Here is an example:
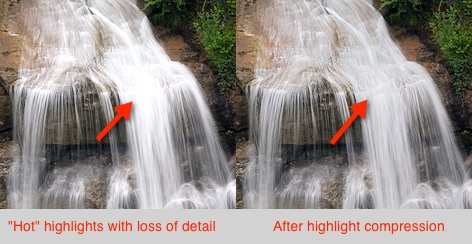
If pushed too far, highlight compression can make parts of the image look "flat", particularly for skin tones.
NOTE: The Illumination control overlaps the functionality of the Highlights and Shadows control. A reasonable strategy is to set the overall brightness first using the Illumination and/or Exposure Offset control, then trim with the Highlights and Shadows controls.
NOTE: Don't be intimidated by terminology like "adaptive lighting", "local contrast", and "dynamic range". Just experiment with the various controls, and you'll quickly get a sense for how they work.
Some examples of adaptive lighting are here.